How to Test Knife Sharpness
Five tests that tell you different things. Used in the right order they will find not just whether a knife is sharp, but which part of your sharpening went wrong.
How this is funded: we earn a commission if you buy through our links, at no extra cost to you. As an Amazon Associate we earn from qualifying purchases. It never changes which knife we recommend, and we’ll tell you when we’d skip one. Full disclosure.
“Is it sharp?” is not one question. An edge can be dull because it has worn round, because it has rolled to one side, because it is chipped, or because a burr is still attached from the last time you sharpened it — and those four problems need four different responses. The tests below distinguish between them, which is why it is worth knowing more than one.
A note on safety before any of it: never run a finger along an edge to test it. Every test here is either non-contact or moves across the edge rather than down its length.
1. The light test — fastest, and it finds damage
Hold the knife edge-up under a bright light and sight down the edge from the heel toward the tip, tilting it slowly.
A truly sharp apex is a line with effectively no width, so there is no surface to catch the light — it is invisible. Anywhere the edge has worn round, rolled or chipped, there is a flat or a facet, and it reflects as a bright line or a glint.
This is the only test that tells you where along the blade the problem is and what kind of problem it is: a continuous bright line means uniform dullness, a bright patch means one worn section, and a dark notch in an otherwise clean edge means a chip. Do this one first, always.
2. The burr check — only after sharpening
A burr is the thin flap of displaced metal that forms along the apex when you have ground far enough on one side. Raising one is the goal during sharpening; leaving one attached at the end is the single most common reason a freshly sharpened knife performs badly.
To check: run a fingertip across the edge, moving from the spine toward the apex and stopping there. A clean edge feels like an edge. A burr feels like a slight catch or a wire, and it will usually be on one side only.
If you find one, do not sharpen more — that just moves the burr to the other side. Remove it with light alternating passes on your finishing stone, or better, with a strop, which takes the burr off more reliably than a stone does.
3. The paper test — the standard benchmark
Hold a sheet of ordinary printer paper by one corner, letting it hang, and slice down through it in a smooth motion away from your hand.
A sharp knife cuts a clean, quiet line. A dull one catches, tears, folds the paper over, or refuses to start the cut at all. It is a good test because paper is unsupported — there is nothing behind it to press against, so the edge has to do all the work.
The mistake almost everyone makes is testing only near the tip. Sharpening inconsistency is regional: most people grind the middle of the blade more than the heel, so the middle passes and the heel fails. Test the heel, the middle and the tip separately. If one region fails, you have just diagnosed your technique, and why your knife won’t get sharp covers the fix.
4. The tomato test — the one that matters
Rest the edge on the skin of a ripe tomato with no downward pressure at all, and draw the knife back toward you.
Tomato skin is smooth, slightly elastic and surprisingly tough, so it is the food most likely to defeat a nearly-sharp edge. A sharp knife bites in immediately on the draw. A dull one skates across the surface, then crushes the fruit when you add pressure.
This is the most kitchen-relevant test on the list, and it is also the one that catches burrs the paper test misses. A burr can slice paper convincingly — the paper is thin and unsupported — and then collapse against tomato skin. If your knife passes on paper and fails on tomato, strop it.
5. Cutting an onion — the real-world check
The least scientific and arguably the most honest. A sharp knife goes through an onion’s outer membrane without the layers sliding apart, and the slices fall away cleanly. A dull one crushes cells rather than cutting them, which is what releases the sulfur compounds that make your eyes water — a dull knife genuinely does make you cry more.
The test not to bother with
Shaving arm hair. It is the internet’s favorite sharpness demonstration and it is close to useless for a kitchen knife. Hair-popping sharpness requires a highly polished apex that a cutting board destroys within a few dozen cuts, so chasing it means either sharpening constantly or accepting that the property you tested for is gone by the time you cook.
It is also a poor diagnostic: a burr will shave. If you want a benchmark, the tomato is a better one, and it is the one your cooking actually depends on.
What each failure tells you
- Bright line along the whole edge: uniform wear. Normal. Go to a 1000-grit stone.
- Bright patch in one region: you are not sharpening that region. Usually the heel, sometimes right at the tip.
- Dark notch: a chip. Grind it out if it is deep, ignore it if it is not.
- Feels sharp, cuts badly: a burr. Strop it.
- Passes paper, fails tomato: also usually a burr, or an edge polished so smoothly it has no bite. Finish one grit coarser next time.
- Was sharp yesterday, dull today: the edge has rolled rather than worn. On a soft Western knife a honing rod fixes it in ten seconds; on a hard Japanese knife, a strop.
Used together, these tests replace the calendar entirely. Rather than sharpening on a schedule, test before you cook and sharpen when the test fails — which is the argument made at length in how often to sharpen a knife.
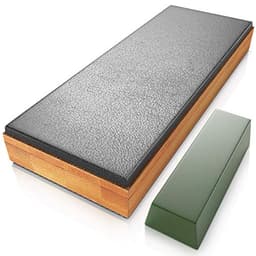
If the burr check is what keeps failing
Sharp Pebble Leather Strop for Knife Sharpening
The strop we would pair with a first whetstone. Leather mounted on a wooden paddle with polishing compound in the box, which is exactly the combination a beginner needs — a bare strop with no compound is a burnisher, not a finisher.
See all five strops comparedFrequently asked questions
How do you know if a knife is sharp?
The quickest reliable check is the light test: hold the edge up under a bright light and sight along it. A genuinely sharp edge has no flat surface at the apex, so it reflects nothing and is effectively invisible. Any bright line, bright spot or glint is a section that is dull, rolled or chipped.
Is the paper test a good way to test a knife?
It is the best all-round test, provided you test the whole edge. Slicing cleanly through printer paper held by one corner requires a genuinely keen apex. The common mistake is testing only near the tip — most sharpening inconsistency shows up at the heel or in the middle, so test all three regions separately.
What is the tomato test?
Resting the edge on the skin of a ripe tomato with no downward pressure and drawing the knife back. Tomato skin is smooth and tough enough to resist a rounded edge, so a sharp knife starts the cut instantly while a dull one skates across or crushes the fruit. It is the most kitchen-relevant of the tests.
Should you test a knife on your thumb?
Not by running your thumb along the edge — that is how people cut themselves. If you want a tactile check, draw a fingertip carefully across the edge, moving from the spine toward the apex and stopping there. That detects a burr safely. Never slide a finger along the length of an edge.
Why does my knife pass the paper test but not cut tomatoes?
Usually a burr. A burr is a thin flap of metal along the apex that can slice paper convincingly while collapsing under the resistance of a tomato skin. It also feels sharp to the touch, which is why it fools people. Strop the knife or make a few very light alternating passes on your finishing stone to remove it.
How sharp should a kitchen knife be?
Sharp enough to pass the tomato test along the whole edge, which is a much more useful benchmark than shaving arm hair. Chasing a razor-level polish on a knife that meets a cutting board every day is largely wasted effort — that edge degrades within a few cuts, while a good working edge lasts weeks.
Sources
- Knife sharpening — Wikipedia — Reference on edge angle, coarse-to-fine grit progression, and honing vs sharpening (accessed July 21, 2026)
- Strop — Wikipedia — Reference on what stropping does to an edge: realigning bent steel, and light abrasion when a compound is used (accessed August 11, 2026)
- How to Sharpen a Knife With a Whetstone — Montana Knife Company — Master-bladesmith walkthrough of whetstone angle, grit progression and deburring (accessed July 21, 2026)
Per-knife specs (steel, HRC, blade length, geometry) are read from each maker’s spec sheet or product listing and dated on the individual review cards above. “Not published” means the manufacturer does not state that figure — we flag it rather than guess.
Keep reading
Why Your Knife Won't Get Sharp
What to do when the tests keep failing.
Troubleshoot itHow to Sharpen a Knife on a Whetstone
The full workflow, from soak to burr removal.
Learn the techniqueHow Often to Sharpen a Knife
The schedule these tests should replace.
Read the guideHow to Strop a Knife
The sixty seconds that fixes most failed tomato tests.
Read the how-to